Some years ago, when I first started my blog, I followed the blog of Phil Brown, from Essex, Massachusetts, USA. Phil was very much into owls at that time. I saw his photographic interest and prowess blossom. Sadly, Phil seemed to abandon his owl blog as the scope of his photographic work broadened. At one point I was extremely impressed by his foray into HDR (High Dynamic Range) image processing. This caused me to look at Photomatix HDR software, and download a trial version (which left a 'Photomatix' overprint on the image). I was pleased with the results, but my use would not be sufficient to warrant the price that they were asking.
HDR software uses multiple versions of an image and combines them in very clever ways to produce dramatic versions.
More recently, I have been taken by the use of HDR that Adrian sometimes shows on his blog. He's particularly good at applying it to farm machinery and to town/village buildings. Adrian uses Nik software for the main part of the HDR process.
After a quick look around, I found the Nik HDR software is an integral part of a software suite from Google - which is free of charge!! You can download the Google Nik Collection from here.
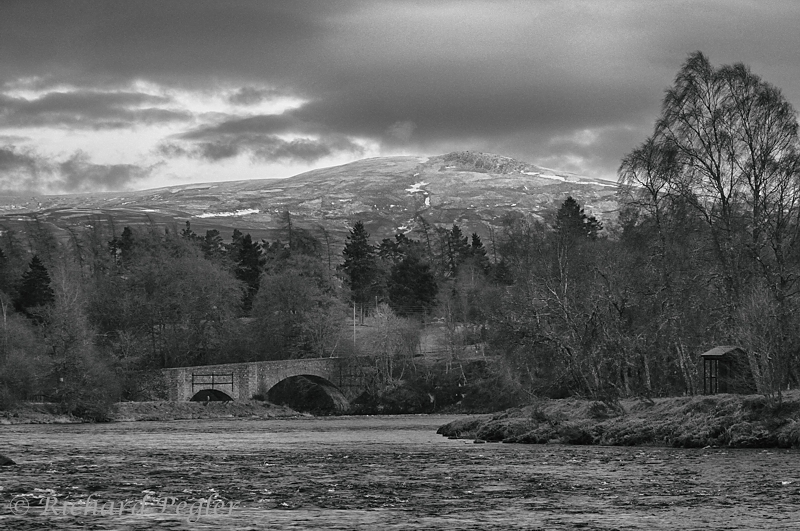
I'm quite pleased with the results I'm getting. In fact I used one such image in my previous post. This is the image, created using the Nik 'Outdoor 1' preset (there are 28 presets to choose from, all of which are tailorable) :
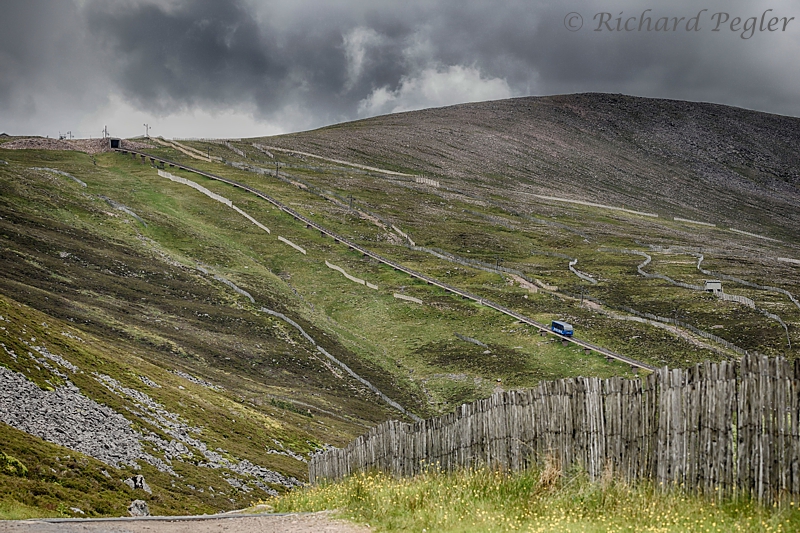 |
| Cairngorm - with 'Outdoor 1' preset used |
This is the somewhat less interesting original!
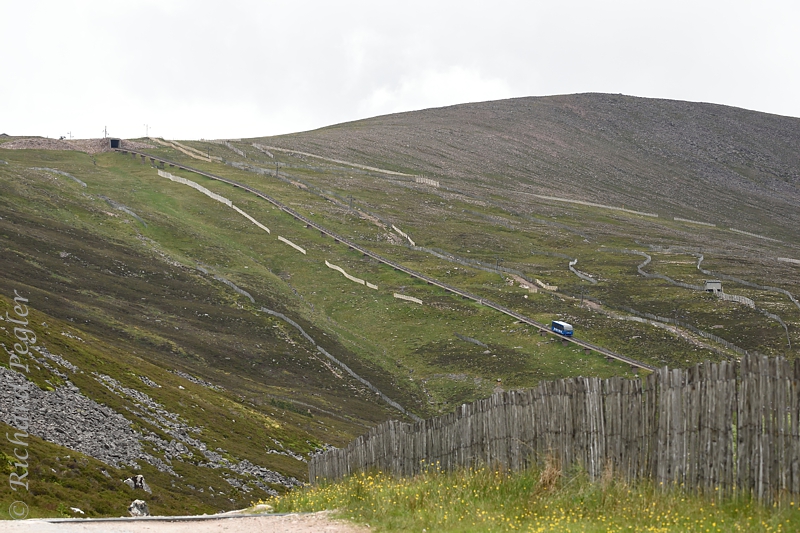 |
| Cairngorm - original image |
HDR seems to work particularly well on landscapes. Here are a few examples. You might not like what I've done, but it does show the potential.
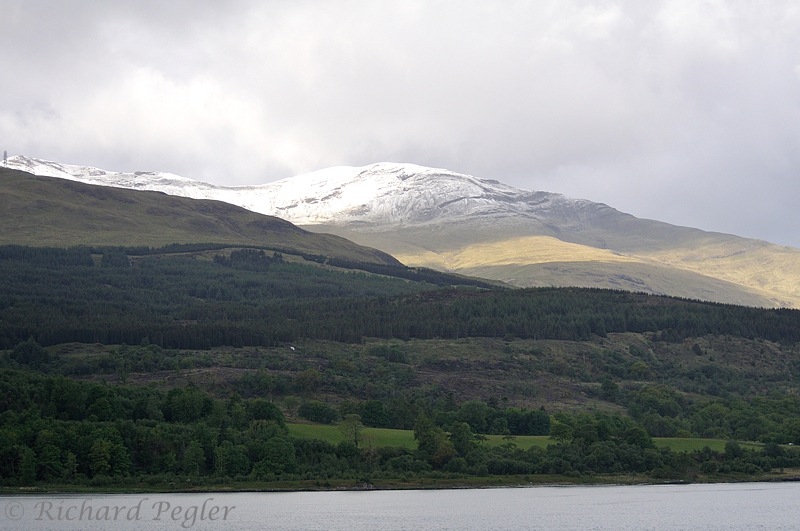
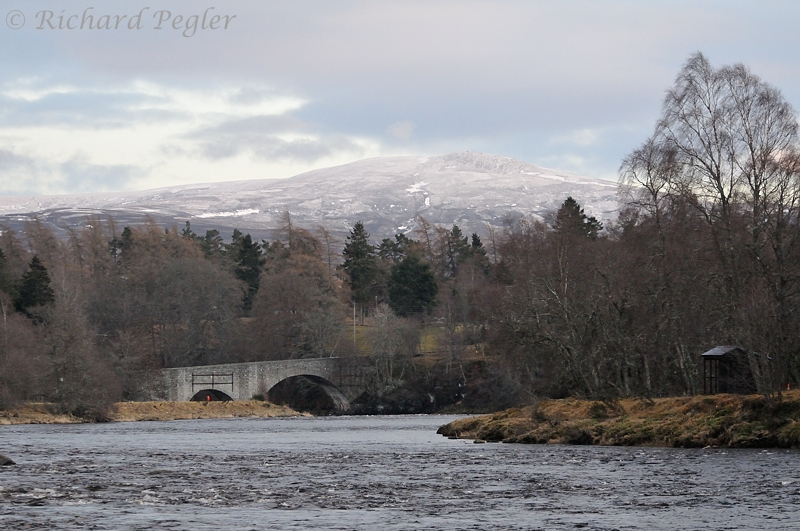
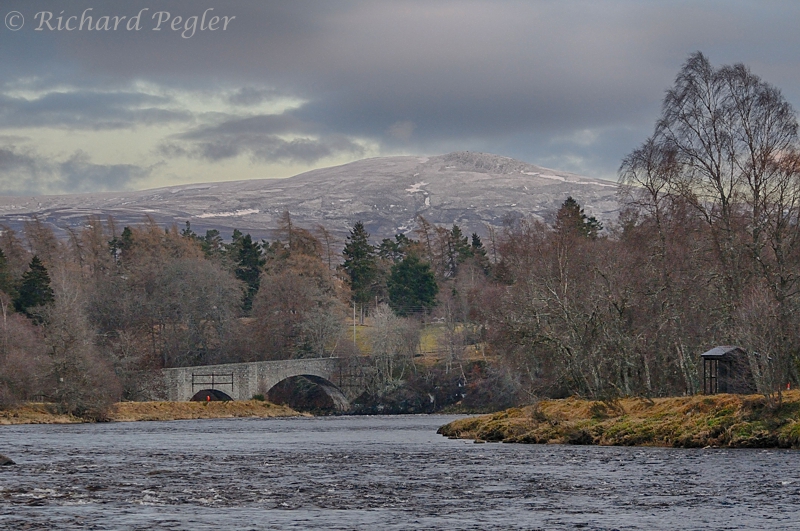
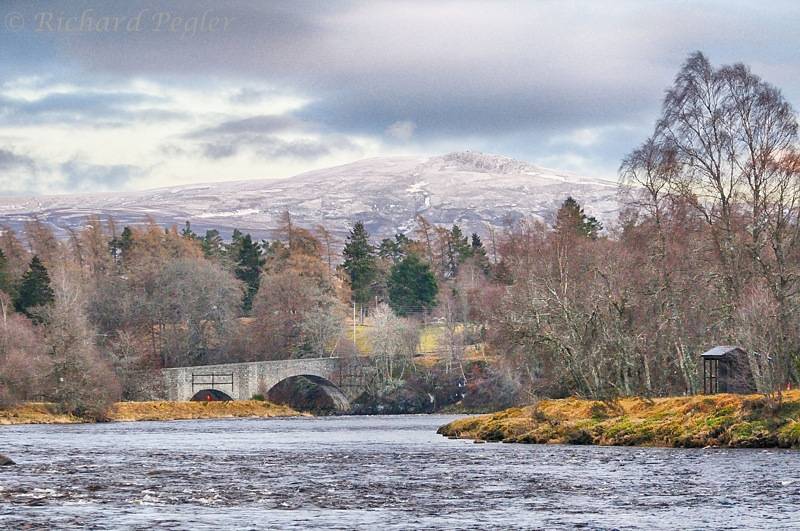
Here's the original image, from which the header for this blog (whilst this post is current) was produced using the 'Outdoor 1' preset:
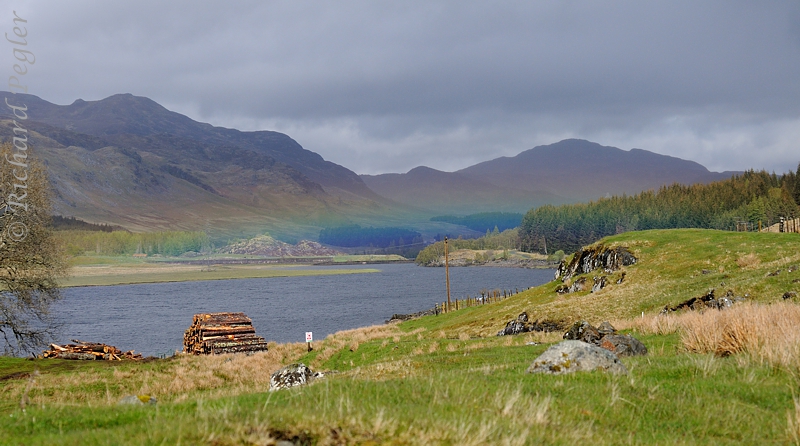 |
| Spey Dam - original |
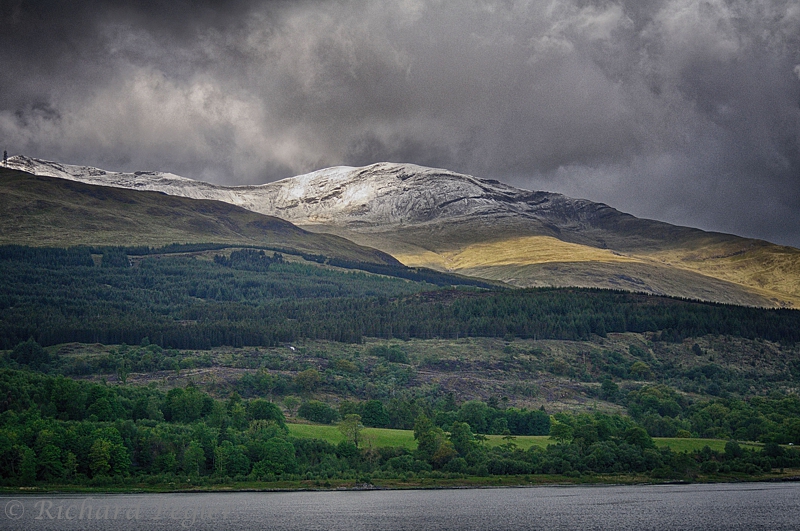
And here's the image with the 'Deep' preset applied:
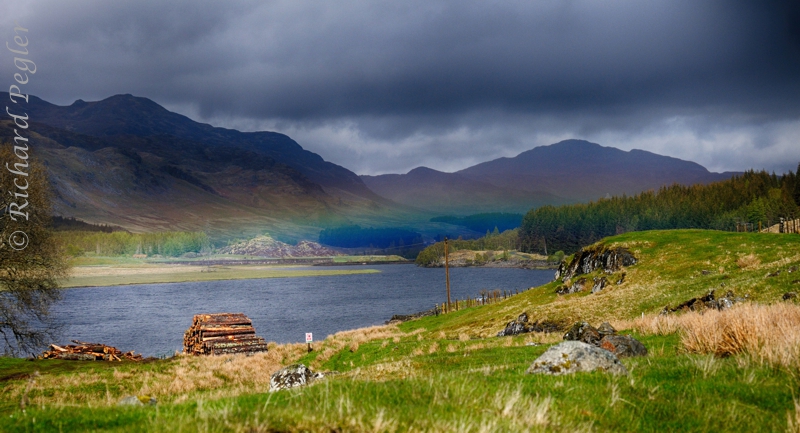 |
| Spey Dam - 'Deep' preset |
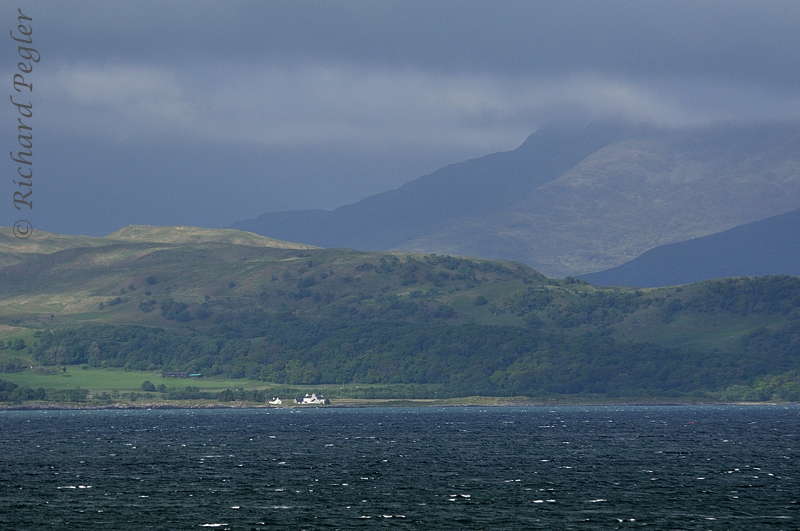
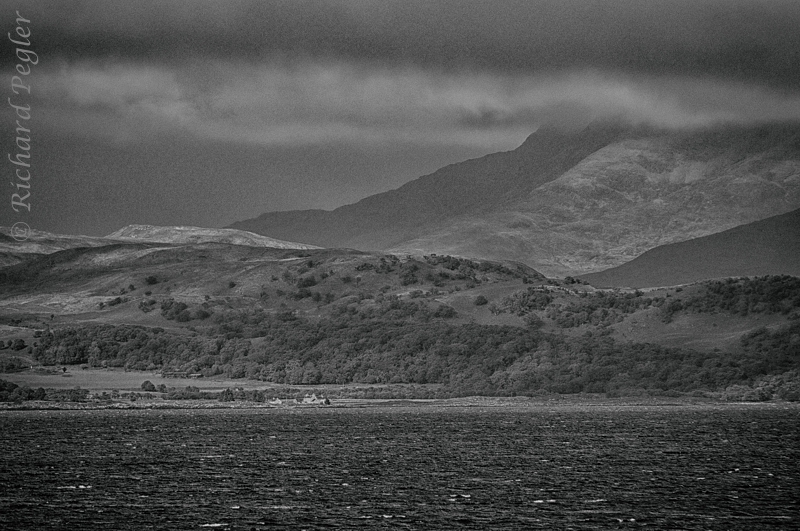
This next one was taken from the ferry from Mull to Oban - three shots from a tripod would have been difficult (I'll explain later!) Here's the original.
 |
| Mull 1 - original |
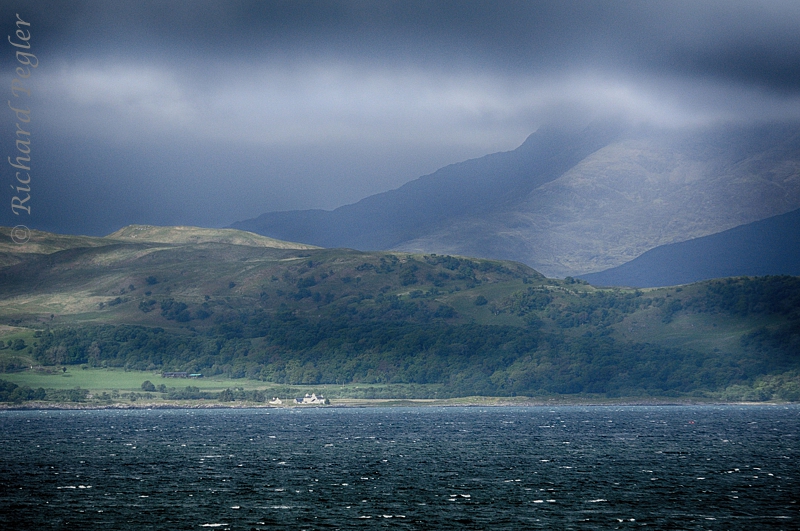
I was utterly amazed at the detail that the HDR software was able to pull out of this!
 |
| Mull 1 - 'Vigneted' preset |
Here's another image - also taken from the Mull ferry. The original is rather flat.
 |
| Mull 2 - original |
The 'Deep 2' preset lifts it a bit, adding atmosphere without spoiling the integrity of the image.
 |
| Mull 2 - 'Deep 2' preset |
However, the 'B&W Artistic' preset finds a lot of hidden detail.
 |
| Mull 2 - 'B&W Artisitic' preset |
HDR doesn't always give pleasing results - no fault of the software, just that some images are best left alone! I'm not sure about these next ones, for example. Although I find the results interesting, I think that the original is probably better.
 |
| Spey - original |
 |
| Spey - 'Balanced' preset |
 |
| Spey - 'Bright' preset |
 |
| Spey - 'B&W realistic' preset |
HDR seems to work extremely well with machinery. The farm which hosts one of my Little Owl sites is home to an assortment of ancient machinery which is kept in running order and is in everyday use. I took this photo of one of the tractors last year.
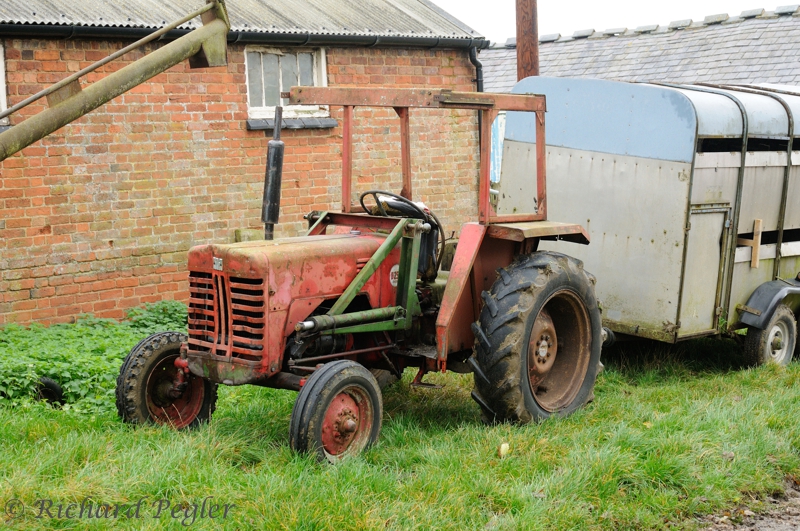 |
| Tractor - original |
I just love the way it's come out, using the 'Granny's Attic' preset! Just look at how all that detail has been 'lifted'!
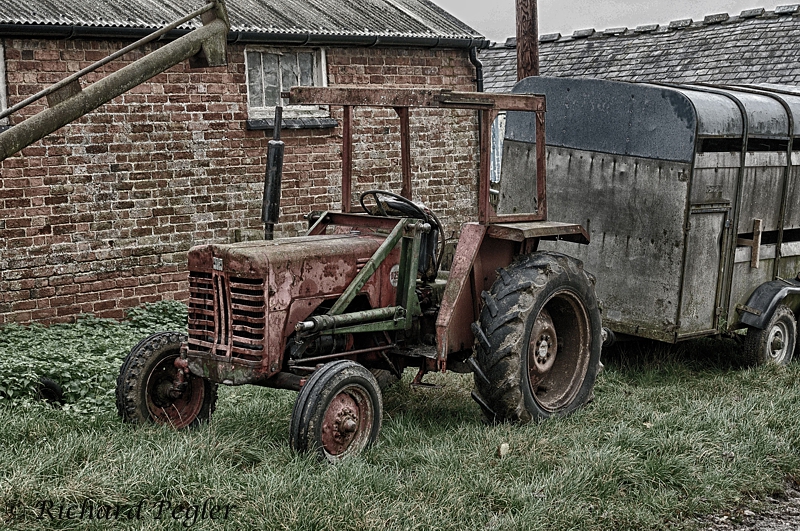 |
| Tractor - 'Granny's Attic' preset |
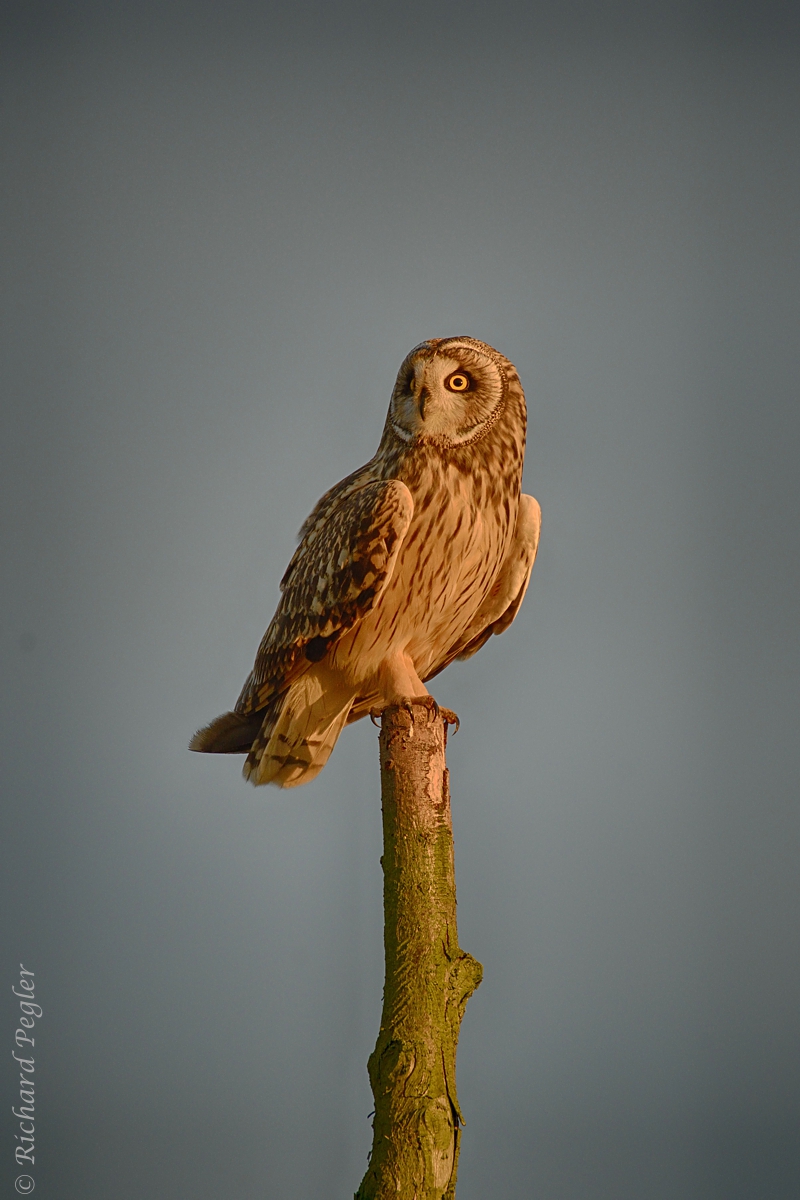
I'd given it some thought, and come to the conclusion that HDR probably had no place in wildlife photography - until I had a play this morning. I now believe it has. Here's an original image.
 |
| SEO - original |
Applying the 'Balanced' preset makes the image look a little unnatural, but brings out detail from the shadows. I'm not too keen on this next image.
 |
| SEO - 'Balanced' preset |
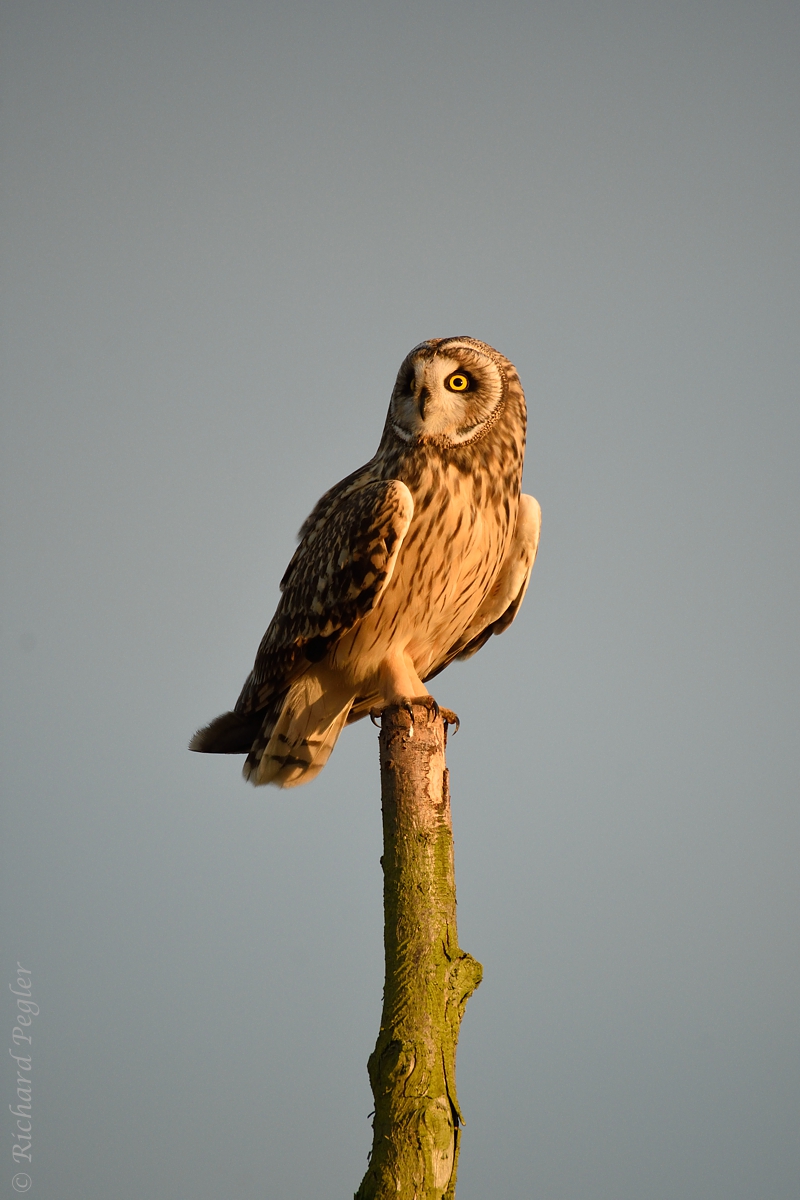
What really knocked me out, however, was when I applied the 'B&W (realistic)' preset!
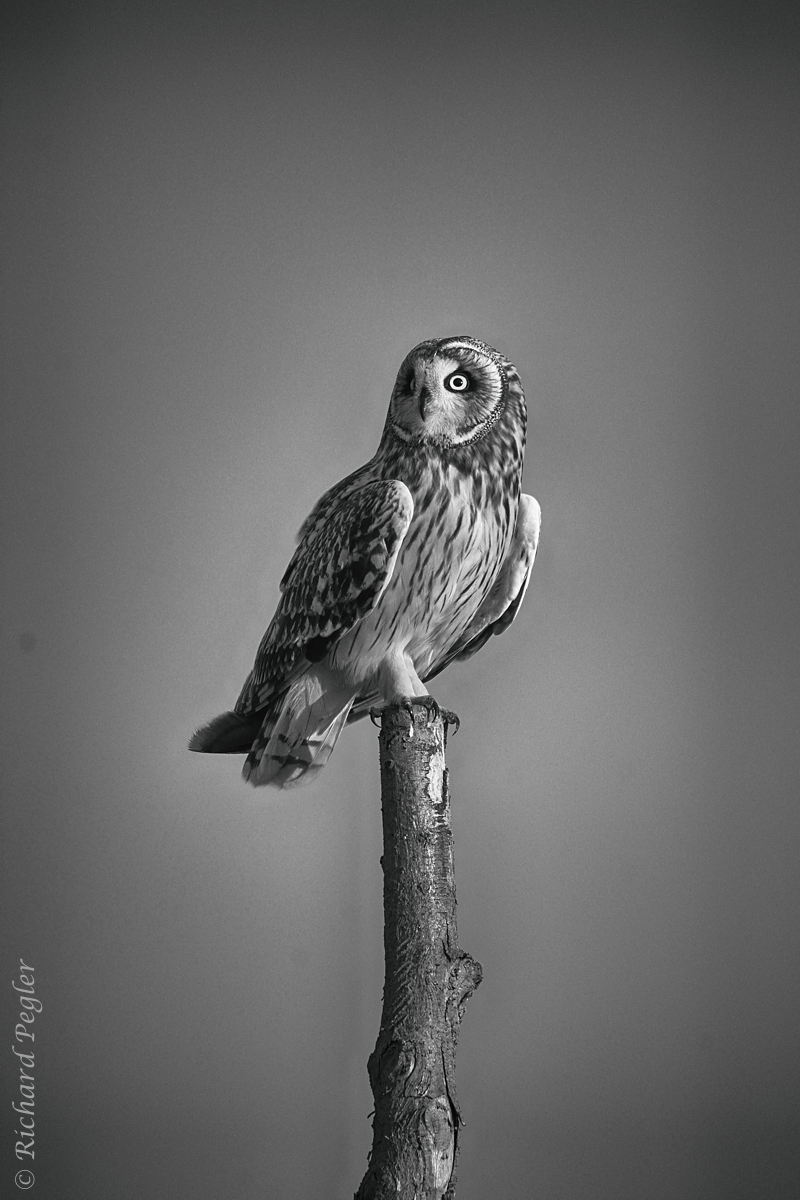 |
| SEO - 'B&W (realistic)' preset |
You'll probably notice that there are several spots on that last image, probably caused by dust on the sensor. I've purposely left them there to illustrate a point. They're on the previous two images too, but HDR does tend to bring out the detail, including the blemishes!
Now to the Science bit!
It
seems that the accepted way of using HDR software is to take three (or
more) images of the same scene with differing exposure settings. For
example you take one with 'normal' exposure, one with a plus 1 exposure
compensation and one with a minus 1 exposure compensation. The
difficulty with this is that, ideally, you need to be using a tripod and your
subject mustn't move (although most HDR software has clever features
that help reduce aberrations caused by movement). Another downside of
this method is that one's use of HDR has to be premeditated.
I
may be missing something important here, but surely there's a simpler
way, using just one image as a starting point - it certainly seems to work for me! This method is dependent on you
shooting your images in 'raw'. It was used on all the examples above, and goes as follows:
Take
your chosen raw image. If you need to adjust the exposure level in the
post-processing stage, apply that compensation to the raw image. Convert
that image to .jpg format, putting a zero into the file name (e.g.
picture 0). Add an additional exposure compensation of plus 1 to the raw
image and convert that to .jpg, putting a +1 into the file name (e.g.
picture +1). Take the exposure compensation back the other way 2 whole
steps and convert it (that's right - picture -1). Now you can use those
three .jpg images in the software, telling it that you've three images
with an exposure step of 1 between them! NOTE: Don't do any cropping on
the originals - wait until the job's done with the HDR. If your original image was a bit out on exposure, you can factor that in. For example if you under-exposed and need to put a +0.4 compensation in during the post-processing to get the exposure right, your other two compensations can be +1.4 and -0.6.
I hope you've found this rather different post from me to be of interest. I've certainly enjoyed playing with this software.
Next time it will be back to the wildlife!
Thank you for dropping by.
Excellent post Richard. Some superb effects there. Just found you on twitter too.
ReplyDeleteThank you, Marc. I find it an interesting tool, but reckon it will be one that will be kept up my sleeve for most of the time, and brought out on rare occasions.
DeleteReally envious of your Willow Emeralds!
Best wishes - - Richard
The difference it makes is impressive even if the technical bit gives me brain ache.
ReplyDeleteIt's quite an amazing tool, Doug, but I'm unlikely to get into the full intricacies of its capabilities (like most of the other tools I use!).
DeleteI hope your week is going well - - - Ricjard
Brilliant images Richard, lovely Owl.
ReplyDeleteThanks, Bob. Best wishes - - - Richard
DeleteI enjoyed these. HDR really does add drama to skies and as you say you can use one image as long as you have sufficient range in four stops. You don't have to convert them in the RAW editor you can just pop the image in as one shot and the software will do that bit for you.
ReplyDeleteI still use Photomatix but am happy with EFEX or NIK and tend to use it by default nowadays. I tend to start with Deep 1 I don't like their B&W converter but must admit it has done a good job on the owl. Photoshop B&W is better as it has almost infinite choice and plenty of presets.
I sometimes make two images it saves them as TIF files which is always a good idea as they are lossless. Then you can pop one over the other and mask out bits you want I usually keep the sky as punchy as possible but then I have no restraint. Desaturating greens can improve things the sponge does a good job with a soft brush set to something like 15%.
It is all about fun.
Hadn't realised that Nik could do the business on a single image, Adrian! Thanks for that info. Tried it with a .jpg image and wasn't impressed - I guess the next thing is to check it out with a single TIF file.
DeleteAll the Photoshop info is lost on me, as I don't use Photoshop. For historical reasons I use Corel. I wish I'd made the switch to Photoshop earlier, but think I'm too old, and have too much money and experience invested in Corel, to make the switch now!
Yes, fun is the key consideration!
Best wishes to you, and to Molly and Alf - - Richard
A very interesting and informativepost Richard. Thanks and it is fantastic to see the difference in the shots
ReplyDeleteThank you, Margaret. It's fun to play with such thing, even if I should be busy doing something else! I hope your week is going well - - Richard
DeleteInteresting post and worth taking a look at though I have to say I can get some of these 'sort of' effects using Jasc photoshop. Hope you are well Diane
ReplyDeleteThank you, Diane, I'm fine! I'm totally unfamiliar with Photoshop so was unaware that it had such facilities.
DeleteI'm looking forward to further installments of your USA adventures. - Best wishes - - Richard
Hey Richard! Very interesting! Greetings
ReplyDeleteThank's, Anne. I was fun to play with such tools, but now I must get back to capturing some widlife images!
DeleteBest wishes - - Richard
Hi Richard, interesting and impressive post, amazing difference between images, even with Joe's tractor.
ReplyDeleteSee you soon, Regards John.
Thanks, John. I was quite surprised at how much detail popped out with Joe's tractor.
DeleteSee you tomorrow! - - - Richard
I like this Richard. It gives great results after the process. The details are much better to see and the clouds in the sky give it extra dimension.
ReplyDeleteRegards,
Roos
Thank you, Roos. There are times when this software can be very effective. I suspect I will not be using very often, however!
DeleteWith my best wishes - - - Richard